I created a single channel LoRa gateway and node to connect to The Things Network using a Heltec Wifi LoRa v2 (ESP32-SX1276). This post is to help others, but also to save the developments so I can use them later myself. This post was originally posted at Hackster: https://www.hackster.io/Arn/single-channel-ttn-lora-gateway-and-nodes-with-esp32-sx1276-709612
Things used in this project
Introduction
This project was developed on a Macbook Pro 2012 (macOS Mojave 14.0.2). It should be working on any development platform.
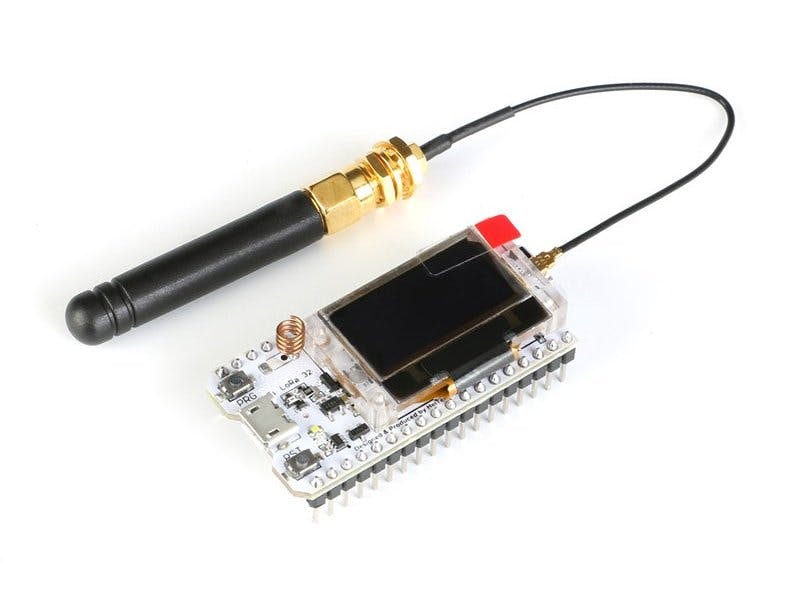
The goal of this project is to create a low cost testing gateway and node for LoRa connection with The Things Network. I recently started tinkering with the ESP32, and was impressed by the capabilities, especially in combination with the low costs of the thing. You can buy 2 Heltec ESP32 based LoRa devices for around 30€. You can use these devices either as a gateway, or as a node, to connect to The Things Network. This means you can have a LoRa connection for 30€! And the good thing is that you can always use the devices for other projects later on.
In this case we create a single channel gateway. This is suitable for development work, but not ready for production. For this you need a better gateway, The Things Industries just released a Gateway for 70€ . A single channel gateway is well suited for testing purposes. They operate on a single channel and spreading factor. Because of the low coverage, and the fact that they are not LoRaWAN compatible, they are not recommended and visible on The Things Network maps. Read more about that here.
Because this is a single channel gateway for testing purposes, joining the TTN network is only available using ABP (activate by personalization), not the recommended OTAA (Over The Air Activation). You can read more about the differences in this post for example. ]
After completing this project, you can transmit messages using LoRa, receive them on your own gateway and send them to the The Things Network where you can use the data-package for further processing. And all that for under 30€!.
Installation of the toolchain
The installation is quite simple. I found out that there are 2 things to look out for:
- Make sure you use a data usb-cable. Some cables do not transfer data, make sure that you have a cable that can handle data. Throw the non-data cables away!
- On macOS, instal the usb to uart vcp drivers. This is needed to make the connection to the device.
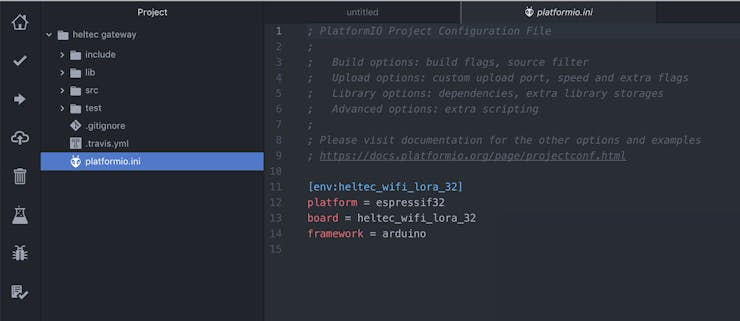
My recommended code editor is Atom, created by Github; in combination with PlatformIO. Install the platformIO package and reboot.
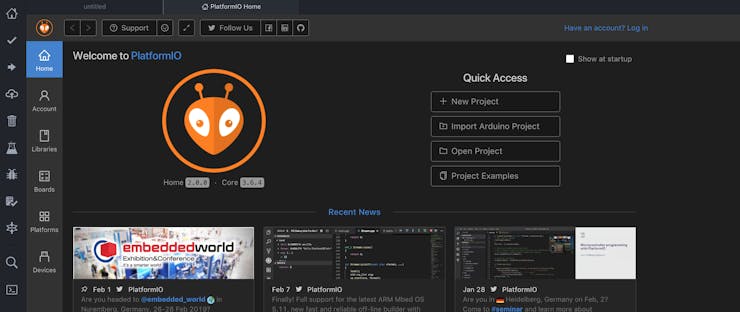
PlatformIO in Atom
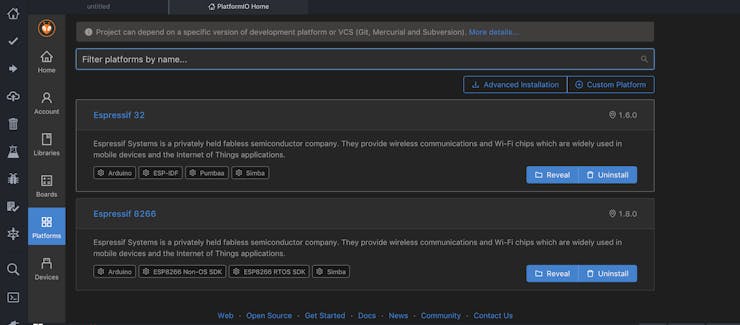
Install PlatformIO platforms: Espressif 32 and Espressif8266:
 Check for the board id: heltec_wifi_lora_32
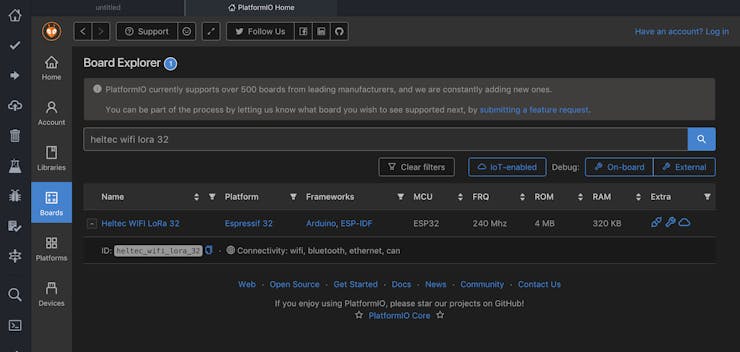 heltec_wifi_lora_32 board definition
Create two new projects: gateway and node
 New project initialized
Installation of the single channel Gateway
After looking at different tutorials, I found this one to be the most complete, and was the one that helped me the most to get things to work. Thanks Sparkfun! The single channel gateway code created by Things4U is the best solution so far. It is easy to setup, has a lot of configuration options, and even provides a web interface to manage the gateway and see the data packages that it receives.
Either download or git clone the repository and place the contents of the ESP-sc-gway folder in your src folder, and the contents of the libraries folder in the lib folder.
Follow the instructions in the Getting started section README.md (with some differences)
-
Connect the Heltec WiFi LoRa v2 and make sure you can connect to the device: menu –> PlatformIO –> Serial monitor. The name contains something like CP2102 USB to UART. If the device is not showing up, check the cable and drivers as mentioned above.
-
Modify the ESP-sc-gway.h (not _loraModem.h) file and change
#define _LFREQ 868 #define _PIN_OUT 4 #define _SPREADING SF9 #define OLED 1 #define NTP_TIMEZONES 1 wpas wpa[] = { { "" , "" }, // Reserved for WiFi Manager { "YOUR SSID", "YOUR PASS" } }; -
Upload the sketch, you should see activity on the screen of the gateway. Open up the Serial Monitor and watch what is going on. In my case I had to reset 2 or 3 times because of some errors. The first time it takes some more time to start because of SPIFFS setup and configuration. The log file shows you the ip-address where the gateway is connected to your router. Note this address, and also the ID of the gateway (we need this for authentication on TTN.
If all went well, open up your browser and open the ip-address you noted before. In my case 192.168.0.120. You now can control you gateway through the web IDE!
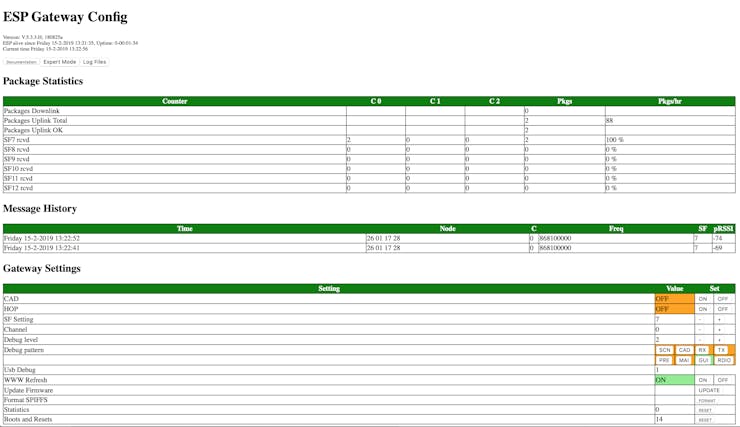 ESP Gateway UI
success!
ESP Gateway UI
success!
Installation of the single channel Node
The installation of the node took a bit more time. I found out in the end that the pin mapping for this device is different than examples I found. I try to keep things as simple as possible, so in this case the node connects using ABP and uses the most basic and widely used libraries. Again, this sparkfun tutorial is the main guideline.
Download the example code: SINGLE-CHANNEL LORAWAN DEVICE EXAMPLEand place ESP-1CH-TTN-Device-ABP.ino as main.cpp in the src folder.
Modify the following (these are the proper pins for the Heltec WiFi LoRa v2):
const lmic_pinmap lmic_pins = {
 .nss = 18,
 .rxtx = LMIC_UNUSED_PIN,
 .rst = 14,
 .dio = {26, 35, 33},
};
Change it into a single channel in setup():
#if defined(CFG_eu868) // EU channel setup
   int channel = 0;
   int dr = DR_SF9;
   for(int i=0; i<9; i++) {
     if(i != channel) {
       LMIC_disableChannel(i);
     }
   }
   // Set data rate (SF) and transmit power for uplink
   LMIC_setDrTxpow(dr, 14);
That’s basically how you setup the node! Later we can expand this with OLED notifications.
But wait! Before uploading this example, there’s one more modification you need to make: your LoRaWAN application, network session, and device keys! For that, and an application server, we recommend The Things Network.
Create an Application and Node(s) in The Things Network
The final step is to set up the application in The Things Network and add the required keys in the node. These steps are well documented, for instance here. So I won’t copy them here.
When you have added the keys to the node-code, upload the sketch to the node and wait for the result. Make sure you have the same channel and Spreading Factor for the node and the gateway. You can check the Serial Monitor for the node to see the activity. If all goes well you should see the messages popping up in the Gateway’s web interface. And you should see them in the Things Network Console as well!
Great! We now have a low cost but robust development platform for The Things Network! We can now focus on applications.
Now that the gateway and nodes are in places, let’s build some great services!